Showing posts with label CRAFTS. Show all posts

Sunday, June 26, 2016

The Whole Picture

I have posted dozens of times about my quilting and sewing projects.  Even though the things I sew aren't elaborate, I know there are a lot of other beginning sewers out there looking for similar projects, so I have no problem posting what I've made.  I have even shown pictures of some not-so-successful items.  So why is it difficult for me to post pictures of my paintings?  I've been painting, off and on, for almost two years but, other than my long-suffering husband and sister, most of my work has been for my eyes only.

Last week I was visiting with a lady from church who I heard, through the grapevine, had done some painting and even won an award in a competition.  She admitted that, yes, she had won an award but she quit painting after only four pictures  "There was no joy in it."  The next year, she started making ceramics, and entered her creations in the same competition.  Because there weren't enough entries in that category, they got lumped into a broad "crafts" category.  In her words, "I didn't stand a chance against the elaborate entries because the judges couldn't see my joy in my ceramics."  Cue the bells, whistles and flashing lights -- this was an "aha" moment for me!

I don't paint to make money or win awards - although I wouldn't mind those things.  I paint for fun, for the challenge of creating something without instructions or a pattern, for making something unique.  I admit up front that my paintings so far are not totally unique - they are my take on photos or images I've seen elsewhere - but I'm working on a couple pictures that, as yet, exist only in my head.

In the mean time, I'm going to display a few of my paintings at home and post them here.  What if everyone who sees them thinks they are amateurish, or ugly, or just plain bad?  It's ok!  It really is ok, because no matter who is viewing and judging my paintings, they can not see the joy I feel while painting them.  They aren't seeing the whole picture!


Wednesday, June 1, 2016

Now What?

Over the winter, I spent more time in book stores than fabric stores.  Cold weather found me curled up with a book, or knitting in front of the TV.  But warmer weather - and a good bargain - have lured me back to the sewing room.  

A local lady advertised a huge lot of quilt kits for sale.  I have no idea where or how she came to own so many kits, but I went to check them out.  Most were wall-hanging size with  "primitive" applique or embroidery - not really my thing - but I did find two Moda charm packs.  I had no plan in mind, and to be honest, they aren't even colors/patterns that grabbed my attention, but I'm a huge fan of pre-cuts (because  I don't care for cutting) and they were less than half the sticker price, so I hoped that they would inspire me.  Not so far!  That's where you come in.

The first pack is "Plum Sweet" by Blackbird Designs.  I actually had a few fat quarters of the darkest florals at some point.  I have no memory of how I used them, but I remember having them in my stash.  The shades of purple are pretty and I like the variety from large flowers to simple polka-dots.  I would probably leave out the center row.   It seems to have too much yellow/gold to blend with the others.  


The second pack is "KT Favorites" by Kansas Troubles Quilters.  When I laid them out, the colors struck me as odd - for lack of a better word.  There are dark blues, greens, browns, reds, neutrals that run from barely-off-white to an orange-beige, and four purple/blues straggling along at the end.  The whole thing is a bit boring.  It needs either a fun application where the individual fabrics blend into a neutral background, or it needs to be mixed with other, more interesting, fabrics.  


So, ideas?  They can always become doll quilts for the kids in foster care, but neither pack screams "little girl".  I found ideas on Pinterest for charm pack tote bags and table runners - neither of which I need.  For the moment, they will go into the stash, but I am trying to use what I buy, so someone help me with this impulse purchase.  What would you make? 


Tuesday, February 16, 2016

Needlework Tuesday

I have an issue with obsessing on a craft and ignoring all others.  At the moment, a stack of sewing projects are patiently waiting while I try every single knitting project on Pinterest.  

Issue #2:  My minute attention span tends to lead to a stack of half-done projects because I want to try the next one.  

Because my knitting skills are still in the beginning stages, most of the projects get started, goofed up, restarted, goofed up . . . .   All in all, not a lot of progress.  I do have a growing stack of dishcloths that need to be blocked and have the ends woven in; and the beginning of a scarf.


I'm working the "Feather and Fan" pattern in a soft, cotton yarn - ecru with purple and green flecks.  I think I will complete the scarf in two pieces, joined at the center so that both ends will be scalloped in the same direction.

But before I got this scarf finished, I found the "Waves" pattern and couldn't wait to try it.

I have struggled mightily with this pattern.  I have restarted this project at least 15 times - no exagerations!  The luxurious, red "Touch of Silk" yarn to too gorgeous to waste, so it is back in a ball and waiting for me to either find a new project, or get the patience to try this again. Do other knitters have patterns that they just can't seem to get right?

Needlework Tuesday is hosted by Heather at Books and Quilts.  Visit Heather to see what others are stitching this week.


Wednesday, January 13, 2016

Knit On . . .

My fascination with knitting continues.  I am sticking to beginner level stuff until I am more confident, but that fits well with my short attention-span and ensuing love for small projects.  This week, I tried a couple new dishcloth patterns.

First is the "Almost Lost Washcloth".  I'm sure it has another name, but that's what the lovely ladies at Simply Notable call their version. I enjoy this pattern because it is nothing but basic knitting, but produces a finished project that looks much more complicated. You can find a link to the pattern for the smaller version on the same site.


Next was the "Rudy Cloth" from Down Cloverlaine.  I think the pattern is adorable, but the design is actually kind of hard to see in reality.  Even though it's just knit and purl, it's a confusing pattern to follow because each row is different.  Since the pattern doesn't show up well (or at all) while you're working, it's easy to get off.  Not conducive to TV watching while knitting.  There are dozens of other picture designs out there, so I may give this idea another try, but it's not at the top of my list.


What are you knitting, sewing or crafting this week?  Visit our host, Heather @ Books & Quilts, to link to Needlework Tuesday and see what others are creating.

Tuesday, January 5, 2016

Old Dogs and New Tricks

Who says an old dog can't learn a new trick?  I have been whining for years that I wish I could knit.  I learned the very basics as a teenager, but never pursued it.  I picked it up again a couple years ago, but got frustrated and quit.  I guess the third time really is a charm.   After hours and hours of knitting and "un-knitting" the same yarn just for practice, I am finally able to do four basic stitches . . . and I am OBCESSED!

Dish cloths/wash cloths seemed like a simple and usable way to practice, so I've tried several patterns.  The first few had some pattern issues.  Actually, they had some issues with my ability to follow the pattern.


Eventually I struck on this diagonal pattern that is so easy to do, even I can't mess it up (at least not much).  


My favorite design so far is this lattice pattern.  It makes a thicker, textured cloth that is better for scrubbing. 


The original pattern includes a crocheted picot edge that gives the cloths a fancier look, but this old dog can only handle one new trick at a time. 

This post is part of "Needlework Tuesday" hosted by Heather @ Books and Quilts.


Tuesday, December 8, 2015

Needlework Tuesday

These Christmas ornaments are not technically "needlework", since there is no sewing involved.  But, since they involve cutting, folding and pressing - close enough.  Fabric squares are folded in half, then into triangles, and pinned into place on styrofoam balls, then the raw edges are covered with ribbon.  Specific instructions are easy to find on Pinterest.


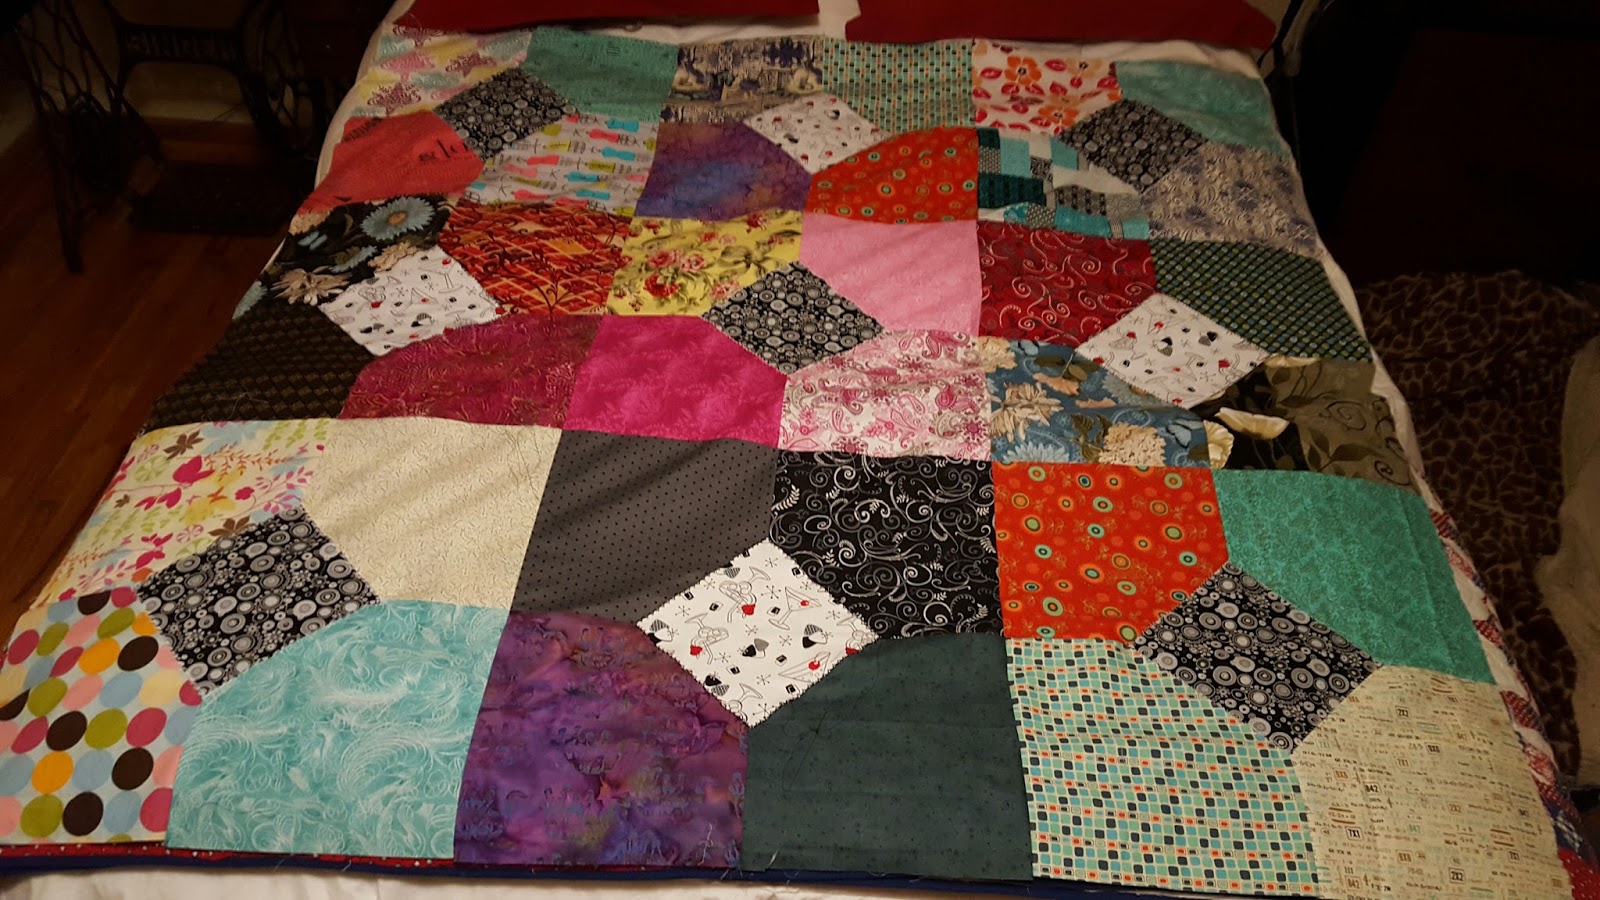
Most of my real stitching this week has been dedicated to making pot holders.  I donated these potholders to a benefit auction at church and one of the ladies there asked me to make sixteen more for her to give as Christmas gifts.  I have 10 left to top-stitch and they are complete. They would have been done sooner, but I got sidetracked by the idea of a "10 Minute Quilt Block".  I saw a video that showed a short-cut method to producing a 20-inch quilt block in 10 minutes.  Theoretically, you could make an entire throw-size quilt top (9 blocks = 60" x 60") in 90 minutes.  In reality, it's possible if you were starting with pre-cut 10" squares and are familiar with the method.  Add in the time it took me to find enough scrap pieces 10x10" or larger, cut them, watch the tutorial again, rip out a few mistakes . . . I still had a 60x60" quilt top assembled in an afternoon.  

Sorry for the poorly lit picture, but you get the idea.
The fabrics are all remnants from favorite projects.  I was hoping for thirty-six different fabrics, not including the black and white center squares, but came up a bit short.   I think there are two fabrics that are repeated.  After I took the picture, I added a border from the same black fabric used for the centers.  It's going to get backed with flannel and tied for a cuddly, TV-watching blanket.  

If you want to try the 10-Minute Block, just search for it on You-Tube.  The same lady also came up with a 5-Minute Block.  This time I purchased a "layer cake" of pre-cut squares.  I only have four squares completed so far.  Hopefully I'll have a finished quilt top to show you next week.

Needlework Tuesday is hosted by Heather @ Books and Quilts.  Visit her to see what she and other participants are stitching this week.

Saturday, December 5, 2015

How Much is That Reindeer in the Window?

Dave gave me that look - the one he gives me when he thinks I've lost my mind - at a recent estate auction.  All I did was bid $3 on a pile of thirteen old and, presumably, useless windows.  Obviously, he isn't up on the latest Pinterest project fads.

Breaking the glass out of a window turned out to be more difficult than Dennis the Menace cartoons would lead you to believe.  I was surprised at how many times the ball merely bounced off the glass, rather than shattering.  Yes, I could have chipped all the putty away from the edges and removed the glass in tact, but where's the fun in that? Eventually, I had an empty window frame, gave it a coat of red paint, sanded half of it back off and created this decoration for the front porch.  Totally worth the 23 cents I paid.


For my second window project I left the glass and chipped paint intact, then added a couple Peeping Toms . . . or Peeping Nicks?  It's hard to get a good photograph.  With no flash, the details don't show up, but the flash creates a glare.  The plan is to hang it in the living room window, but until I make a run to the hardware store, it's propped on the sill.  Who's betting that it will still be propped on the sill on Christmas day?


Back to Pinterest.  I need eleven more project ideas.

Tuesday, November 24, 2015

Good-bye Old Friend

Dave bought me this Kenmore sewing machine in 1981, a year before we were married.  For thirty-four years, it has followed me from house to house, town to town, state to state and back again.  You can see the packing tape on the cover, to ensure heavy-handed movers didn't knock the latches open mid-move.  There were years that it just sat in a closet until someone needed a split seam repaired, but it has gotten it's fair share of use and it's age is showing.  New belts and oil aren't getting rid of the bumps and squeaks any more, and the bobbin winder ceased winding.  The part it needs is no longer available, so I've been getting by with a "Side Winder" - a small machine that does nothing but wind bobbins - and not very well.  The time has come to put the old girl out to pasture.  

I read various web-sites that reviewed the best machines for an average seamstress.  I don't need to spend thousands of dollars on a computerized model that knows more than I do.  I don't make the kind of projects that require that.  I just want to do a little quilting, a little crafting, simple clothing construction and repairs.   I settled on this Singer heavy-duty model - deemed "Best In Class" for beginning to moderate sewing.


I haven't had a lot of time to play with the new stitches, but it sews smoothly, the tension remains constant and the bobbin doesn't tangle on every-other seam.  Those are all great strides!  This model also adapts for free-motion quilting, which I'm anxious to try on small projects.

My old pal will remain in storage for the time being - in case I need a back up - but I'm enjoying the ease of sewing with my new friend.

Thursday, November 19, 2015

My God-Given Right to Craft . . .

Did you know crafting is biblical?  One of my favorite Bible verses is 1 Thessalonians 4:11 - "Make it your goal to live a quiet life, minding your own business and working with your hands, just as we instructed you before."  Christian comedian Anita Renfroe, posted her personal paraphrase of that verse on Facebook:  "Calm down.  Mind your own business.  Do crafts."  I totally agree!

I have been studying the Proverbs 31 woman in recent months and it occurred to me that this seemingly-unobtainable model of womanhood was slipping in some craft time, cleverly disguised by biblical language.  

"She selects wool and flax and works with eager hands."   She goes fabric shopping and can't wait to get to her sewing room.

"In her hand she holds the distaff and grasps the spindle with her fingers."  The spindle and distaff are tools used to spin yarn, and why make yarn except to knit and crochet?

"She makes coverings for her bed."  Quilts, of course!

"She makes linen garments . . . and supplies the merchants with sashes."  She sews clothing and accessories.

"She speaks with wisdom and faithful instruction is on her tongue" - She posts tutorials for her projects to share with fellow crafters.

So, no more guilt over time spent in "crafty pursuits".  I'm simply obeying scripture!


Thursday, October 15, 2015

Craft Crazy

I finished a quilt!  It's small and it's simple, but it's done!  I made the top four years ago from a package of pre-cut squares purchased at Wal-Mart.  We had just moved, so I was unemployed and was easing myself back into quilting after a five year break. It's a bit too small to be a lap quilt, but looks pretty draped over the back of a chair.   Lesson from this quilt:  look at your fabrics from a distance before you start sewing.  The lines of the lattice pattern on the blue fabric appear even from up close.   But when you step back, one diagonal is definitely dominant and the lines don't all go the same way.  Details, details!

The rest of my sewing time has focused on small projects - some for a craft sale coming up at church, and some just for kicks.  Like this mug rug.  They are hard to see but the quilting lines on the top section are the "steam" rising from the coffee.


This coloring book and Crayon caddy will be donated to the church craft auction . . . (sorry, I didn't take time to stage pretty pictures.)


 As will this quilted basket - after it's filled with cookies . . .

And this set of three potholders that still need the quilting done.


There are a couple table runners in the works but not sure if they'll get done in time.  Why is it that, when I'm sewing items to give way, everything seems to go wrong?  I goofed on quilting the basket, but I think I covered it well.  The potholders were supposed to be a set of four but somehow I cut one owl centerpiece "wonky" but didn't notice until it was assembled and the entire thing was "mega-wonky".   I finally got the corner points on one table runner to align correctly - after several retries and sewing the entire bottom border on upside down once - and realized I had swapped two blocks so they didn't match the top border.  I let it sit for 24 hours while I cooled off, then tore it apart - again - and reassembled it correctly with all points matching.  Now I may not have enough time to get it quilted and bound.  Oh, the joys of sewing!

Friday, September 25, 2015

Sisters, Sisters . . .

Sisters come in all shapes, sizes, personalities and relationships.  There are The Three Weird Sisters in Shakespeare's Macbeth:

Double, double toil and trouble -- fire burn and cauldron bubble . . .

There are the three Weird Sisters from the book by Eleanor Brown:
See, we love each other.  We just don't happen to like each other very much.
There are close sisters, like Jo, Meg, Beth and Amy in Little Women, and some who don't quite see eye to eye, like Cinderella and her Wicked Step Sisters.

There are even twin sisters who are separated at birth then meet, quite coincidentally, at summer camp ten years later, despite the fact that they live on separate continents.  At least that's what happens in The Parent Trap.

My favorite sisters in film are the Haynes Sisters from White Christmas, played by Vera Ellen and Rosemary Clooney:  


My sister, Teri, and I have a lot in common with all of these famous sisters - well, except for the magic spells and the separated at birth thing.  And the ability to sing and dance.  Well, really, nothing except the bond of sisterhood.

This past weekend was our 2nd Sisters Weekend.  Sisters weekends are  loosely organized 48-hour periods in which we share craft ideas, gifts, laughs, and some deeper moments.  Each sister provides a craft project (including supplies), an activity (such as jigsaw puzzle, coloring books, or a walk) and, if they choose, a Bible lesson or topic of discussion.  Throughout the day we take turns selecting the next item on the itinerary.  

Prior to Sister Weekend, Teri suggested we participate in Just One Word for 2016.  The idea is to select one word - just one - to be my focus for the new year.  It's harder than it sounds!  Teri shared a worksheet that uses thought provoking questions to guide you in narrowing the scope until you find just one word.  I'll share more on my chosen word in December or January.

We made these Scripture Rings - eleven verses framed with scrapbook paper and glued to shipping tags.  The verses all pertain to our "one word" and are meant as an easy visual aid to keep them fresh in our minds. 

While we were being introspective, we made an "Owl About Me" art project.  The basic outline was intended for grade-school children, and I think an 8-year-old would find it easier than I did to list "Things I'm good at" or "A dream of mine". 

We tried out the latest craze - adult coloring books; made bookmarks; and had a lesson on another new trend - Bible journaling. In between there was a lot of laughter,  chit-chat on topics we haven't had time to keep up with, and evenings of relaxation by the fire pit or in the hot tub - or both.  

If you are fortunate to have a sister, book your own Sister Weekend - even if it all you can spare are a couple hours. 
 A sister is a little bit of childhood that can never be lost. ~Marion C. Garretty


Wednesday, September 23, 2015

All Wrapped Up In One . . .


Creativity isn't just about the finished project,. Crafting, painting or sewing can create moments of beauty during an ugly time; memories with a good friend; or cheer during moments of loneliness.  All of those things were created at my house over the past few weeks.

While Amanda was home for her grandpa's funeral, she made me this beautiful sunflower wreath.  She had made one for herself - a little reminder of her Kansas roots while she's living in the dessert - and I requested one for my door. 


And speaking of Amanda, when she is at home in the dessert, she works with abused children.  With some help from my mom and my sister, we are furnishing each girl (and boys, if they choose) a doll and doll blanket.  This week I ran across kits for a "self-binding receiving blanket".  I didn't want to pay the price for the kit, but I found the instructions on YouTube from Missouri Star Quilt Co.   They advertise it as a 10-minute project.  It's closer to 30 when I'm doing it, but it's still a quick, easy way to make a binding with mitered corners.  I used the technique to finish some doll-size quilt tops, then made one from this adorable penguin flannel.  A yard and a quarter of both the flannel and the coordinating fabric makes four doll blankets.  I also threw in a few "dolly diapers".  


You had to know there would be a bag of some sort in my crafting.  This basket is just the right size to hold pencils, sewing notions or the TV remote.  My sister requested two to use as Easter baskets.  I found the pattern on Riley Blake Designs via Pinterest.


I cleaned out and sorted my fabric stash according to size - then went in search of projects on my Pinterest boards to use up some of the small pieces.  Some were more successful than others.

First up was this fabric "lily plate" from Michelle Made Me.  This project turned out to be more complicated than I expected.  I am marginally happy with the results, but I will make some adjustments in the technique before I try again. 


Fabric Christmas trees were a bust. They looked so cute in the pin from this blog but not so at my house.  Part of the problem is that I chose fabrics that are too similar and thus the tiers have very little definition.  The majority of the problem is that I thought it would be cute to fussy cut the top tier and center Santa's face.  It's not.  My trees look like The Nightmare Before Christmas meets The Coneheads.  I'll try again - some day - in better fabric choices.


My favorite new pattern was for these simple potholders.  These are a great way to use up scraps - especially leftover 2" strips - and there are dozens of color/arrangement combinations to make them unique. Best of all - no binding! 

For the top potholder, I used 4 strips each of three different fabrics, plus a fourth fabric for the center hexi and backing.  For the bottom version, I used two strips each of six fabrics and lined them up so that like fabrics touched.  I intend to make more of these and will probably add a second layer of Insulbright batting.  One layer isn't enough heat protection if you have to hold the pan for more than a few seconds.

There was more crafting as part of a Sister Weekend, but that's a post for tomorrow.  

This post is linked to Needlework Tuesday (hosted by Heather at Books and Quilts), Inspiration on Monday (hosted by Trish @ Love, Laughter and a Touch of Insanity, and Fall Pin It/Do It, also hosted by Trish.  And all of them at least a day late!  

Tuesday, August 25, 2015

It's In the Bag

My fascination with sewing bags and totes continues.  I completed two bags this week - one is adorable and one not so much.

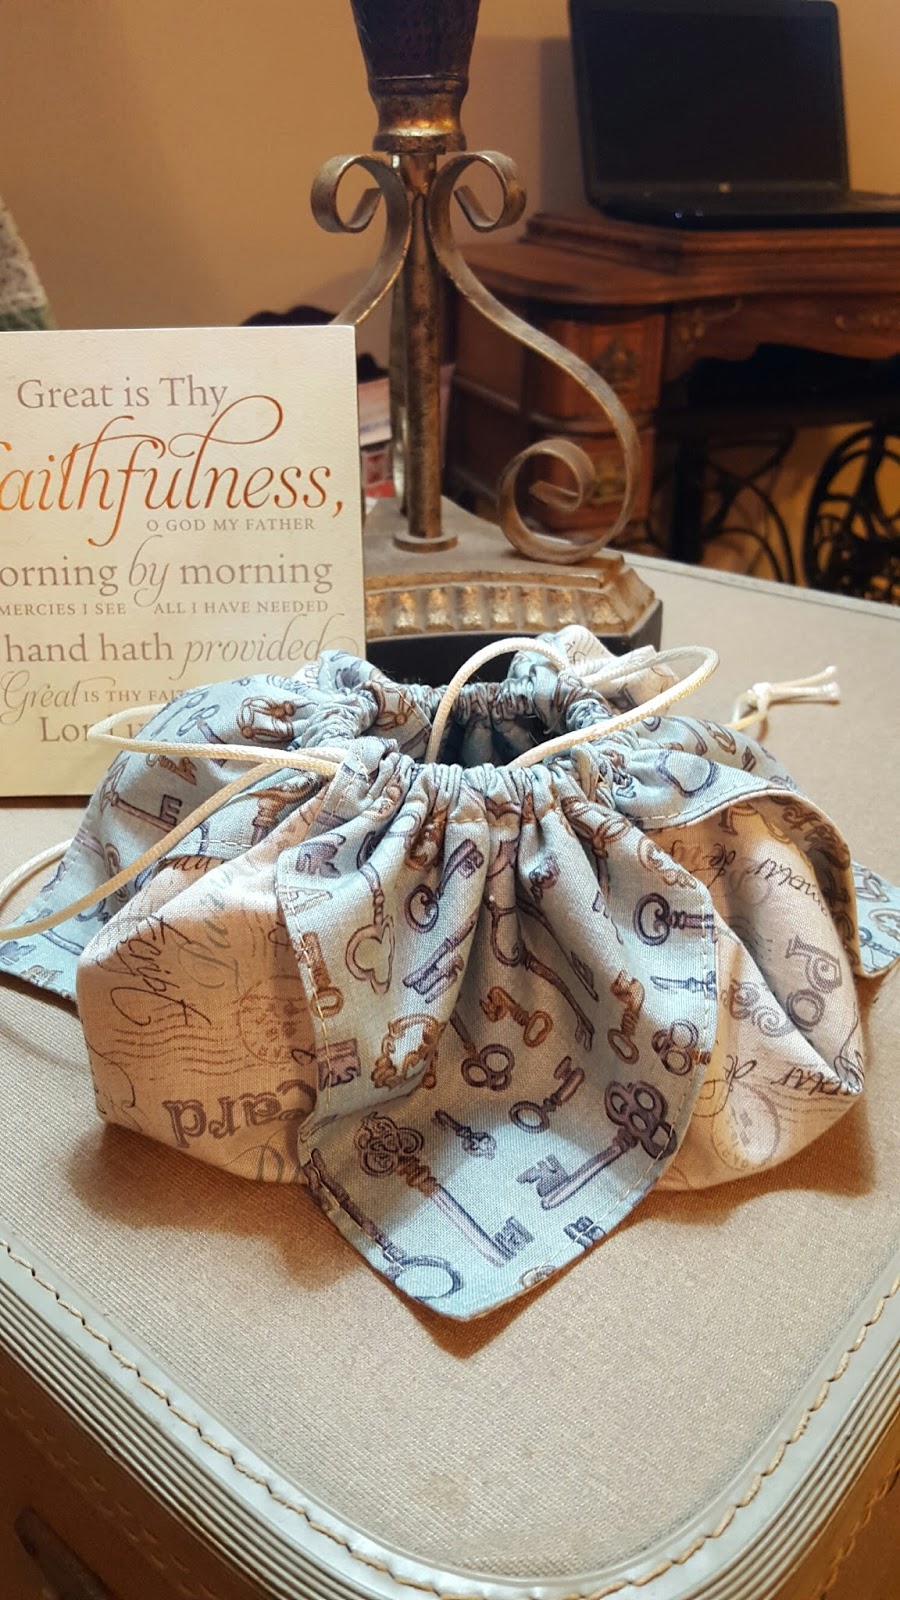
The adorable is the Origami Bag from The Crafty Mummy.  It's about as simple as a bag can get:

  • Sew 2 18" squares together - turn, press and top stitch
  • Fold all four corners toward the center of the square, pin and stitch 1/2" from the folded edge to form the casing.   (The amount you fold determines the size of the "ears" and the depth of the bag.  Mine are 5", measuring from point to top of the casing.)
  • Thread ribbon or cord through the casing and voila! - an adorable drawstring bag.  


The not-so-adorable bag is this "teacher's bag", the first of two I'm making for my nieces. The bag is designed to hold a Rubbermaid file holder, which functions both as an organizational aid and as a framework to give the bag shape.   As my luck usually runs, Rubbermaid has discontinued them.  I found an office supply site that offered the rack below as a replacement with a promise that the measurements are the same.  The width is adjustable and the sides fold in. 

 With careful arrangement, the completed bag doesn't look too bad.


But what woman is going to take the time to pose her bag every time she sets it down??  Under normal use, the bag looks more like this:


The sides of the plastic file holder are not high enough to give structure as it appears on the pattern, and the sides of the holder do not lock in place, so they have a tendency to fold inward. It's inconvenient and makes it harder to load papers, etc.  Although it's a usable bag, it's not what I want to give my nieces.  Fortunately I have enough fabric to begin again with another pattern.   This time the bag gets it's shape from heavy-duty interfacing.

So, it's "back to the drawing board" or, in this case, the cutting table.

This post is linked to Needlework Tuesday, hosted by Heather and Quilts & Books.  

Tuesday, August 18, 2015

Needlework Tuesday

The next step in my plan to update my living room is recovering Dave's recliner.  I started out to purchase a new one, but after multiple stores, styles and colors I realized that the best compromise between our widely varied tastes was the La-Z-Boy chair we already have.  And why buy a new one when this one is structurally and functionally sound.   So I spent hours one afternoon at the upholstery shop looking at at least 50 books of potential chair coverings.  The options are overwhelming.  Fortunately, a designer friend helped me understand not only color, but pattern, texture, durability and "hand" - how the fabric feels to touch - and I was finally able to make a decision. 

Totally by coincidence, the upholstery shop I chose shares their building with a quilt shop.  (I'm trying to look surprised.)  So of course I browsed through the rows.  Lots of beautiful fabric and lots of beautiful projects on display . . . and one thing I have never seen before.  A large basket held "Scrap Bags".  Each bag was filled to bulging with the leftovers from the beautiful projects the store staff made for display.  These were not remnants, which are normally yardage.  These were the sections left from yardage when blocks or patterns are cut.  The fabrics were packaged according to color/coordinates or theme.  Of course, you can see the outermost fabrics to have a glimpse at what you're getting, but the complete variety and size of pieces remains a mystery until you get home.  For $8, I decided to give it a try.  I'm very happy with what I got:


Most pieces are strips - width of fabric by anywhere from 4' to 15"


These are obviously cut from some sort of panel or border fabric.  They may be more challenging to incorporate, but fun.

My bag also included some random pieces in related colors.  The largest piece I received was 2 strips, each 3 yards x 15".  The smallest were 4" squares.  I'm not sure how I'll use this scrap bag, but I'm sure they'll show up in future projects.

Also part of my living room re-do, the decorator/friend suggested some large, bright floor pillows to counter my tendency for solid color furniture, and because Dave lays on the floor to watch TV.  I found these patterns at the same store:


I'm participating in a reading challenge this week, but maybe I can actually slip in some sewing time.

This post is linked to Needlework Tuesday, hosted by Heather @ Books and Quilts


Tuesday, August 4, 2015

The Return of the Bag Lady

I think I may be a bagaholic.  But since there are no twelve-step programs for that - yet - I'll just keep sewing.  This time I got hooked on the Tulip Purse.  I purchased the pattern at a local quilt shop, but I have seen it available on-line as well.  The pattern comes with four sizes and is moderately easy to make. 

My first Tulip purse was a size small, but it's plenty big enough for what I usually carry.  I really like this bag because it is sturdy (thanks to iron on fleece) and opens wide to avoid digging for things.  The only change I would make would be the length of the closure flap.  I used a magnetic closure - the button is just for decoration - and I should have shortened the flap and put the magnet closer to the top of the purse.   I like to keep my cell phone in the outside pocket, and the way that the flap overlaps the top of the pocket makes it inconvenient. 


 My second bag was from the petite size pattern.  I used a loop and button closure on this one but I much prefer the magnet.  The pink trim along the top of the pocket was my own addition.  I just thought the "Zentangle" fabric needed a splash of color.  The pattern also comes in large and jumbo - but I haven't tried them yet.


In my first Bag Lady post, I mentioned making the Updated Classic Duffle for Amanda, but I forgot to take a picture of the finished bag before she went home.  I remembered it while I was visiting her recently, so here's her duffle bag.  This is a super easy way to install a zipper in a fully lined bag.   For details, refer back to the original post.


My niece, Kate, spent a weekend with us and she wanted to sew.  This was rather spur of the moment, so I didn't have anything planned, but we found enough coordinating fabric to make pillowcases.  Kate did a wonderful job!  This is only her second time sewing.  

Kate made the medallion print and I used a retro Christmas print.
And I saved the best for last - doll blankets to be distributed (along with a doll) to abused and neglected children.  I had several packages of pre-cut 2 1/2" squares, so when I heard about this opportunity to donate doll blankets, I decided they would be quick and pretty. I sorted the squares according to color and added borders from scraps I had in my stash.  I ended up making 7 quilt-tops.  The seventh one, made from all the leftover pieces, isn't pictured.  I'm using a quick method to finish them - cutting the back slightly larger than the top and folding the extra over to make the binding, then tying the quilt rather than quilting.  I already have ideas for some more simple blankets to make when these are done.

This post is linked to Needlework Tuesday, hosted by Heather @ Books and Quilts; and Inspiration Monday, hosted by Trish at Love, Laughter and a Touch of Insanity.